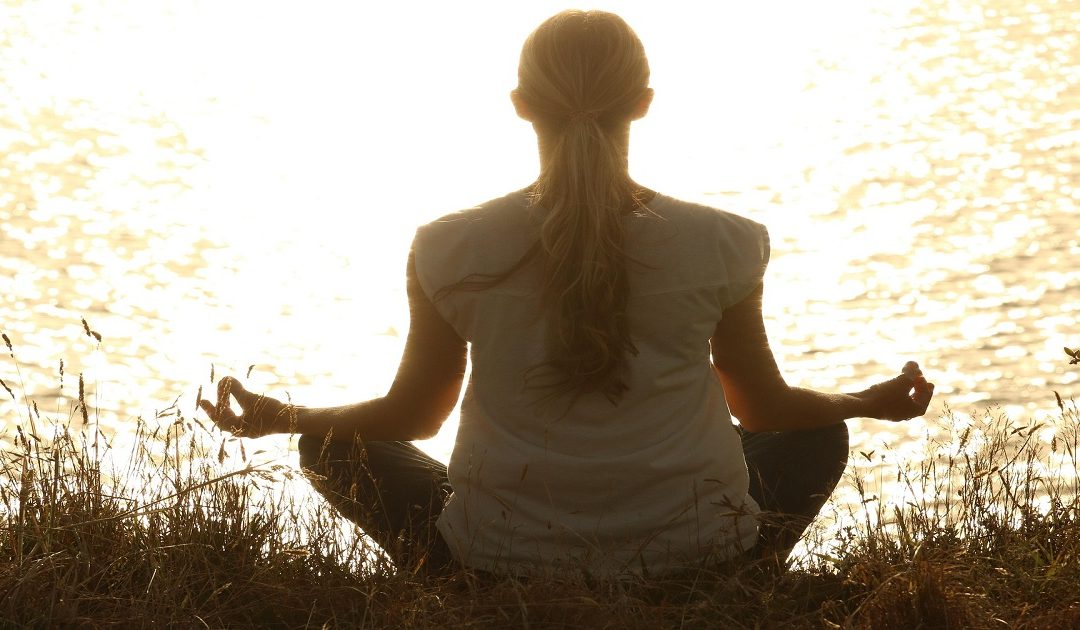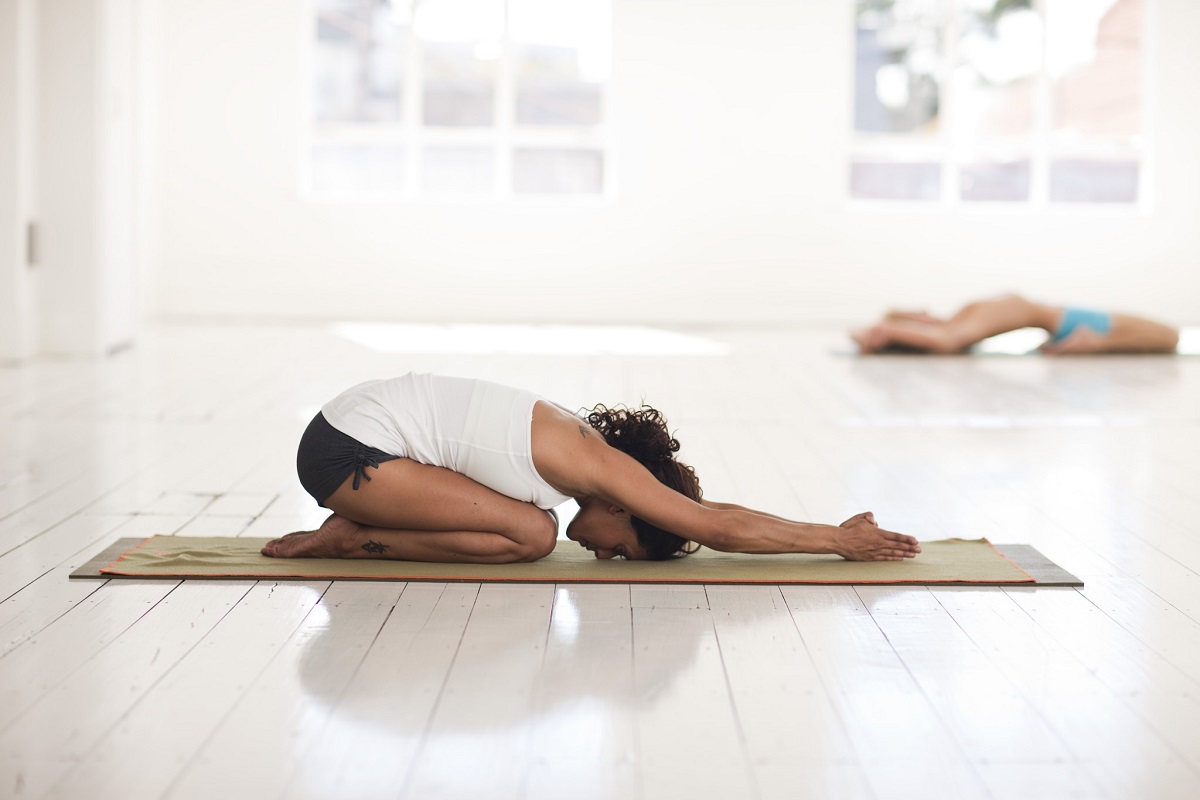
Sunburn Remedies: 11 Simple Ways to Soothe Your Skin

Sunburn Remedies: 11 Simple Ways to Soothe Your Skin

Sunburn Remedies: Natural Relief That Actually Helps

Your skin is hot, tight, and every t-shirt suddenly feels like sandpaper — the classic sign you stayed out in the sun a little too long. If you’re searching for sunburn remedies, the priority right now is cooling the skin down and easing the pain, not reaching for the first internet home-remedy list you find, since a few popular “remedies” can genuinely make sunburn worse. This guide covers what actually helps at each stage of healing, the well-meaning mistakes that slow recovery, a simple way to judge how severe your burn actually is, and the clear signs that mean it’s time to see a doctor rather than keep treating it yourself at home.

Quick Answer

For mild sunburn, cool the skin with a cool (not ice-cold) shower or damp cloth, apply a fragrance-free moisturiser or pure aloe vera gel, and drink extra water to counter fluid loss. Avoid ice directly on skin, petroleum-based products, and popping any blisters. Most mild sunburn improves within 3–5 days; seek medical care for widespread blistering, fever, or signs of heat illness.

Key Takeaways

  • Cooling the skin gently and gradually matters more than any specific product you apply.
  • Sunburn draws water out of your body — hydration is part of the treatment, not just a side note.
  • Some popular remedies (ice, butter, petroleum jelly) can trap heat or irritate burned skin.
  • Never pop sunburn blisters — this significantly raises infection risk.
  • Most mild-to-moderate sunburn heals in 3–5 days with proper care.
  • Severe blistering, fever, or dizziness are signs that need medical attention, not more home remedies.

Why Trust This Guide

This guide was written and reviewed by the Spiritual Meditation Yoga Editorial Team. We’ve specifically flagged the popular sunburn “remedies” that can actually cause harm, rather than listing every folk remedy uncritically, and we’re upfront about when a burn has crossed from “treat it at home” into “needs a doctor.”

What’s Actually Happening to Sunburned Skin

Sunburn is an inflammatory skin reaction to excess ultraviolet (UV) exposure, essentially a burn injury to the skin’s outer layers. Redness, heat, and pain usually appear within a few hours and can worsen over the following 24 hours, even after you’re out of the sun.

Mild sunburn (redness, mild pain, no blistering) is generally safe to manage at home. Sunburn with widespread blistering, severe pain, or symptoms of heat illness is a different category that needs medical attention — the two shouldn’t be treated the same way.

The First Hour: What to Do Immediately

  • Get out of the sun and cover exposed skin with loose, breathable clothing.
  • Cool the skin gradually with a cool (not ice-cold) shower or a damp cloth — sudden extreme cold can shock already-irritated skin.
  • Drink water straight away, since sunburn draws fluid to the skin’s surface and away from the rest of your body.
  • Avoid tight clothing over the burned area, which can cause friction on sensitive skin.

Soothing Remedies for the Days That Follow

  • Pure aloe vera gel (from the plant or a fragrance-free product) is one of the most consistently recommended natural options for soothing mild sunburn.
  • A cool oatmeal bath can ease widespread itching and irritation — blend plain oats into a fine powder and add to a cool bath rather than a hot one.
  • Fragrance-free, gentle moisturiser applied to slightly damp skin helps lock in moisture as your skin heals.
  • Cool compresses reapplied several times a day can ease pain in specific areas without shocking the whole body.

Editor’s Insight: Timing matters as much as the product — applying a soothing moisturiser to damp skin right after a cool shower traps in more moisture than applying it to dry skin later.

Why Hydration Matters More Than People Realise

Sunburn pulls fluid toward the skin’s surface as part of the healing response, which can leave the rest of your body relatively dehydrated even if you don’t feel unusually thirsty. Drinking more water than usual for the first day or two, alongside your usual meals, supports the skin’s healing process from the inside rather than relying on topical treatments alone.

Common Mistakes That Make Sunburn Worse

Mistake 1: Applying ice directly to the skin. Why it happens: it feels like it should cool a burn fastest. Why it matters: direct ice can shock and further damage already-irritated skin. Better approach: use a cool (not freezing) compress or a cool shower instead.

Mistake 2: Using petroleum jelly or thick, oil-based products. Why it happens: they’re common go-to moisturisers. Why it matters: they can trap heat in the skin and interfere with healing during the acute, hot stage of a burn. Better approach: stick to lightweight, fragrance-free, water-based moisturisers or gels until the heat and redness have settled.

Mistake 3: Popping blisters. Why it happens: they can be uncomfortable and tempting to relieve. Why it matters: blisters protect healing skin underneath; popping them significantly raises infection risk. Better approach: leave blisters intact and cover loosely if needed.

Mistake 4: Going back out in the sun before skin has healed. Why it happens: one burn doesn’t always stop plans for the next day. Why it matters: already-damaged skin burns more easily and severely on re-exposure. Better approach: keep the area fully covered and out of direct sun until healed.

Mistake 5: Using strong exfoliants or scrubbing peeling skin. Why it happens: peeling skin can look like something to “clean up.” Why it matters: forcibly removing peeling skin before it’s ready can damage the new skin underneath and increase infection risk. Better approach: let peeling skin shed naturally; keep the area moisturised instead.

A Real-World Scenario: Three Days of Recovery

Illustrative Scenario

This is a composite example built from common experiences, not a verified individual case. Emma, a 27-year-old who lost track of time at a beach day, noticed her shoulders were hot and tender by evening. On day one, she took a cool shower, applied pure aloe vera gel, and drank extra water throughout the evening — the heat and tightness eased noticeably by the next morning, though the redness remained. On day two, she kept the area covered from further sun and reapplied moisturiser to slightly damp skin twice a day. By day three, mild peeling had started, which she left alone rather than picking at, and the discomfort had mostly resolved.

A pattern of noticeable easing within 24 hours of consistent cooling and moisturising, with full improvement by day three to five, is typical for mild sunburn, though severity and healing time vary and this isn’t a guaranteed timeline.

Which Approach Fits Your Burn Severity?

What You’re Seeing Approach
Mild redness, slightly warm to the touch Cool shower + light moisturiser, monitor over 24 hours
Noticeable redness, tight/painful skin, no blisters Cool compresses + aloe vera + extra hydration for 2–3 days
Small, localised blisters Leave blisters intact, loose covering, monitor for signs of infection
Widespread blistering, fever, or feeling unwell See a doctor — this is beyond home care

Comparison: Sunburn Remedies by What They Actually Do

Remedy What It Helps With Notes
Cool shower/compress Immediate heat and pain Avoid ice-cold water or direct ice
Pure aloe vera gel Soothing, mild anti-inflammatory effect Choose fragrance-free, pure products
Cool oatmeal bath Widespread itching/irritation Use cool, not hot, water
Extra water intake Overall healing, dehydration prevention Especially important the first 24–48 hours
Fragrance-free moisturiser Ongoing comfort, reduces peeling severity Apply to slightly damp skin

Sunburn Care Checklist

Checklist 1: Right After You Notice It

  • Get out of the sun and cover the area
  • Take a cool (not ice-cold) shower
  • Drink a full glass of water
  • Avoid tight clothing over the burned area

Checklist 2: Days 1–5

  • Apply aloe vera or fragrance-free moisturiser to damp skin, twice daily
  • Keep drinking extra water
  • Avoid direct sun exposure on the area until fully healed
  • Leave any blisters or peeling skin alone rather than picking at them
  • Watch for worsening symptoms that need medical attention
sunburn remedies

When Sunburn Needs Medical Attention

Important Safety Note

See a doctor for sunburn with widespread or large blisters, signs of infection (increasing pain, pus, spreading redness, warmth), fever, chills, or if the burn covers a large area of the body. Seek urgent medical attention for signs of heat illness — dizziness, confusion, rapid heartbeat, or fainting — alongside sunburn, and for any sunburn in a baby under one year old. This guide is educational and isn’t a substitute for professional medical advice.

Frequently Asked Questions

What is the fastest way to soothe sunburn?

A cool (not ice-cold) shower or damp cloth applied soon after you notice the burn, followed by pure aloe vera gel, tends to bring the fastest noticeable relief.

Does aloe vera really help sunburn?

Yes, for many people — pure aloe vera gel has a soothing, mildly anti-inflammatory effect and is one of the most consistently recommended natural sunburn remedies.

Should I put ice on a sunburn?

No — direct ice can further shock and damage already-irritated skin. Use a cool compress or cool shower instead.

Is it okay to pop sunburn blisters?

No — blisters protect the healing skin underneath, and popping them significantly increases the risk of infection. Leave them intact and covered loosely if needed.

How long does sunburn take to heal?

Most mild-to-moderate sunburn improves noticeably within 24 hours and largely heals within 3–5 days with proper care. More severe burns can take longer and may need medical attention.

What should I avoid putting on sunburned skin?

Avoid petroleum jelly and other thick, oil-based products (which can trap heat), strong exfoliants, and anything fragranced, which can further irritate sensitive skin.

When should I see a doctor for sunburn?

See a doctor for widespread blistering, signs of infection, fever, or symptoms of heat illness like dizziness or confusion — these go beyond what home remedies can safely manage.


Internal Linking Recommendations

Anchor Text Destination Reason
Natural Remedies hub [INTERNAL LINK — Natural Remedies cluster page] Parent cluster link
natural allergy relief [INTERNAL LINK — natural allergy relief guide] Related cluster (Natural Remedies)
how to reduce stress naturally [INTERNAL LINK — stress reduction guide] Related Holistic Wellbeing pillar content

Replace each [INTERNAL LINK — …] placeholder with your real published URL once available — no URLs have been invented here.

Image Recommendations & Alt Text

  • Hero image: person applying aloe vera gel to a sunburned shoulder — Alt: person applying aloe vera gel to soothe sunburned skin
  • First-hour section image: cool damp cloth applied to sunburned skin — Alt: cool damp cloth used to ease sunburn heat and pain
  • Hydration section image: glass of water beside a sunhat — Alt: staying hydrated to support sunburn healing

Schema Recommendations

  • Article schema — headline, author, datePublished, dateModified
  • FAQPage schema — for the 7 FAQ questions above
  • BreadcrumbList schema — Home > Natural Remedies > Sunburn Remedies

Sources & References

  • General principles reflect widely recognised, low-risk approaches to mild sunburn care (cooling, hydration, gentle moisturising) and commonly recognised warning signs for when sunburn needs medical attention. Readers with severe burns, signs of infection, or heat illness symptoms should seek medical care rather than rely on home remedies alone.

About the Author

Written and reviewed by the Spiritual Meditation Yoga Editorial Team. We publish educational content on natural wellness, meditation, yoga, mindfulness, spirituality, and holistic wellbeing, prioritising clear explanations, responsible guidance, and a transparent distinction between general home-care tips and situations that need professional medical attention.

This content is for educational purposes only and is not a substitute for professional medical advice.

Last reviewed: September 2026

Conclusion

Most sunburn is uncomfortable rather than dangerous, and responds well to gentle cooling, pure aloe vera, and extra hydration over the first few days — while a few popular “remedies” like ice and petroleum jelly are worth actively avoiding. Watch for the signs that mean a burn needs more than home care, and let this be the nudge to reach for proper sun protection next time you’re out.

Natural Ways to Get Rid of a Headache: 9 Simple Tips

Natural Ways to Get Rid of a Headache: 9 Simple Tips

Natural Ways to Get Rid of a Headache Without Medication

Your temples are throbbing, the light feels too bright, and reaching for another painkiller feels like the only option — except you’d rather not, or you’ve already had one today. If you’re looking for natural ways to get rid of a headache, the technique that actually helps depends heavily on what’s causing it: a dehydration headache doesn’t respond to the same thing as a tension headache from hunching over a laptop all day. This guide walks through how to match the right natural approach to your specific headache, the mistakes that quietly make headaches worse, and — because this matters — the warning signs that mean a headache needs urgent medical attention rather than another cup of water.

Quick Answer

To ease a headache naturally: drink a full glass of water first, since dehydration is a common trigger. For tension headaches, try a warm compress on your neck and shoulders plus gentle stretching; for a throbbing headache, a cold compress on your forehead can help. Resting somewhere dark and quiet, reducing screen time, and slow breathing all support relief across most headache types.

Key Takeaways

  • Water is the single most under-used natural headache remedy — dehydration is a very common trigger.
  • Tension headaches and throbbing headaches respond better to different temperature therapy (warm vs. cold).
  • Screen time and posture are frequently overlooked contributors, not just food or stress.
  • Gentle neck and shoulder stretching can ease tension-related headaches within minutes.
  • A headache diary helps identify personal triggers faster than generic advice.
  • Certain headache symptoms need urgent medical attention rather than home remedies — covered below.

Why Trust This Guide

This guide was written and reviewed by the Spiritual Meditation Yoga Editorial Team. As a site built around meditation, yoga, and mindfulness, we’ve focused this guide on the mind-body techniques we genuinely understand well, alongside standard low-risk lifestyle advice — and we’ve included clear, upfront red-flag symptoms rather than burying them at the bottom, because knowing when to stop self-treating matters as much as the remedies themselves.

Why Headaches Happen (and Why the Type Matters)

Most everyday headaches fall into a few common categories: tension headaches (often from stress, posture, or screen strain), dehydration headaches, sinus-related headaches, and headaches linked to skipped meals or poor sleep. Migraines are a distinct, more intense condition with their own triggers and treatment needs.

The reason “just drink water and lie down” doesn’t always work is that different headache types respond to different approaches — a tension headache from hunched shoulders needs a different response than one caused by dehydration or eye strain. Identifying the likely type, even roughly, makes natural relief far more effective than following a one-size-fits-all list.

Quick Relief Techniques by Headache Type

  • Dehydration headache (dull, whole-head ache, often with thirst or fatigue): Drink a full glass of water and wait 20–30 minutes before trying anything else — this alone resolves many mild dehydration headaches.
  • Tension headache (band-like pressure, often with tight shoulders or neck): Apply a warm compress to your neck and shoulders, and gently roll your shoulders and stretch your neck side to side.
  • Throbbing or migraine-type headache: Rest in a dark, quiet room with a cold compress on your forehead or temples; avoid screens and strong smells.
  • Sinus-related headache (pressure around eyes/cheeks): A warm compress over the sinuses and staying well hydrated can ease pressure; steam inhalation may also help some people.

Mind-Body Techniques: Breathing, Stretching, and Rest

Since stress and muscle tension are common headache triggers, techniques that calm the nervous system and release physical tension are genuinely useful tools:

  • Slow breathing: A few minutes of slow, extended-exhale breathing can ease the physical tension that feeds a stress-related headache.
  • Gentle neck and shoulder stretches: Slowly tilting your head side to side and rolling your shoulders can release the muscle tension behind many tension headaches.
  • A short break from screens: Even five minutes looking at something distant, away from a screen, can ease eye-strain-related headaches.
  • A brief lie-down in a dark room: Particularly effective for throbbing or light-sensitive headaches.

Editor’s Insight: A quick meditation-style pause — sitting quietly with slow breathing for even three minutes — often does more for a stress headache than people expect, precisely because it addresses the muscle tension rather than just the pain signal.

Daily Habits That Prevent Headaches Before They Start

  • Consistent hydration throughout the day, not just when you notice thirst.
  • Regular meals — skipping meals is a common, underrated headache trigger.
  • Screen breaks every 30–45 minutes if you work at a computer, using the 20-20-20 rule (every 20 minutes, look at something 20 feet away for 20 seconds).
  • Consistent sleep timing — both too little and too much sleep can trigger headaches for some people.
  • Reviewing posture at your desk, particularly screen height and shoulder position.

Common Mistakes That Make Headaches Worse

Mistake 1: Reaching for caffeine as a default fix. Why it happens: caffeine can genuinely help some headaches. Why it matters: it can also trigger headaches in people who are caffeine-sensitive, and withdrawal from regular caffeine is itself a common headache cause. Better approach: notice whether caffeine helps or worsens your specific headaches before relying on it.

Mistake 2: Staying on screens through a tension headache. Why it happens: work doesn’t pause for a headache. Why it matters: continued screen strain feeds the exact muscle tension causing the headache. Better approach: take even a five-minute screen break at the first sign of tension building.

Mistake 3: Skipping meals when busy or stressed. Why it happens: stress often suppresses appetite. Why it matters: skipped meals are a common, underestimated headache trigger. Better approach: keep a simple snack accessible on demanding days.

Mistake 4: Using the wrong temperature therapy for your headache type. Why it happens: people default to whichever they have handy. Why it matters: cold can worsen some tension headaches, and heat can worsen some throbbing headaches. Better approach: match warm compresses to tension/stiffness and cold compresses to throbbing pain.

Mistake 5: Ignoring a recurring pattern instead of tracking it. Why it happens: individual headaches feel like one-off events. Why it matters: recurring headaches often share an unnoticed trigger — poor sleep on certain days, a particular food, or a stressful weekly meeting. Better approach: a brief headache diary for two weeks often reveals a pattern generic advice can’t.

A Real-World Scenario: Tracking a Recurring Headache

Illustrative Scenario

This is a composite example built from common experiences, not a verified individual case. Aisha, a 29-year-old graphic designer, had tension headaches most Wednesday afternoons but hadn’t connected the pattern. She started a brief headache diary noting time, activity, and symptoms. Within two weeks, the pattern was obvious — Wednesdays involved a long back-to-back meeting block with no screen breaks. She added a five-minute stretch and water break between meetings, and the Wednesday headaches became noticeably less frequent within a few weeks, though the occasional busy day still triggered one.

Spotting a specific, personal trigger through a short tracking period is a commonly reported way to make natural techniques far more effective than generic advice, though patterns and results vary by individual.

Which Technique Fits Your Headache?

What It Feels Like Try This First
Dull ache, thirsty, tired A full glass of water, wait 20–30 minutes
Band-like pressure, tight shoulders Warm compress + neck/shoulder stretches
Throbbing, light-sensitive Dark, quiet room + cold compress
Pressure around eyes/cheeks Warm compress over sinuses + hydration
Comes on after long screen sessions Screen break using the 20-20-20 rule

Comparison: Natural Techniques by Speed and Effort

Technique Time Needed Speed of Effect
Drinking water Immediate 20–30 minutes
Warm/cold compress 5–10 minutes During use
Neck/shoulder stretching 2–5 minutes Fast for tension headaches
Screen break / dark room rest 5–20 minutes Moderate
Headache diary / trigger tracking 2 weeks Long-term prevention

Headache Relief Checklist

Checklist 1: Right Now

  • Drink a full glass of water
  • Identify the likely type (tension, throbbing, sinus, dehydration)
  • Apply the matching temperature therapy
  • Step away from screens for at least 5 minutes

Checklist 2: This Fortnight

  • Start a brief headache diary (time, activity, symptoms)
  • Add scheduled screen breaks if you work at a computer
  • Check your hydration and meal consistency across the week
  • Note any pattern by day of week or activity
natural ways to get rid of a headache

When a Headache Needs Urgent Medical Attention

Important Safety Note

Seek urgent medical attention for a headache that is sudden and extremely severe (often described as “the worst headache of your life”), follows a head injury, comes with a stiff neck and fever, confusion, slurred speech, weakness on one side, vision loss, or a headache that wakes you from sleep and keeps getting worse. See a GP for headaches that are new and persistent, changing in pattern, or happening more than a couple of times a week. This guide is educational and isn’t a substitute for professional medical advice.

Frequently Asked Questions

What is the fastest natural way to get rid of a headache?

For a dehydration headache, a full glass of water often helps within 20–30 minutes. For a tension headache, a warm compress with gentle neck stretching can bring relief within a few minutes.

Does drinking water really help headaches?

Yes, for many people — dehydration is a common headache trigger, and even mild dehydration can worsen or cause headache symptoms.

Should I use heat or cold for a headache?

It depends on the type: warm compresses generally suit tension headaches with tight muscles, while cold compresses tend to help throbbing or migraine-type headaches better.

Can stress cause headaches?

Yes — stress commonly triggers tension headaches through muscle tightness in the neck and shoulders, which is why breathing and stretching techniques can genuinely help.

How can I prevent headaches from screen time?

Use the 20-20-20 rule (every 20 minutes, look at something 20 feet away for 20 seconds), take regular breaks, and check your screen height and posture.

What should I avoid when I have a headache?

Avoid continuing screen use through worsening pain, skipping meals, and relying on caffeine as a default fix without noticing whether it actually helps your specific headaches.

When is a headache a medical emergency?

A sudden, extremely severe headache, one following a head injury, or one with fever, stiff neck, confusion, or one-sided weakness needs urgent medical attention rather than home remedies.

Sources & References

  • General principles reflect widely recognised, low-risk approaches to common headache types (hydration, temperature therapy, screen breaks, trigger tracking); the red-flag symptoms listed reflect widely recognised medical guidance for when a headache needs urgent care. Readers with severe, unusual, or worsening headaches should consult a doctor rather than rely on home remedies alone.

About the Author

Written and reviewed by the Spiritual Meditation Yoga Editorial Team. We publish educational content on natural wellness, meditation, yoga, mindfulness, spirituality, and holistic wellbeing, prioritising clear explanations, responsible guidance, and a transparent distinction between general home-care tips and situations that need professional medical attention.

This content is for educational purposes only and is not a substitute for professional medical advice.

Last reviewed: September 2026

Conclusion

Getting rid of a headache naturally works best when the technique matches the type — water and rest for dehydration, warmth and stretching for tension, cold and dark quiet for throbbing pain. Track your patterns for a couple of weeks and you’ll likely spot a trigger no generic list could tell you, and always treat sudden, severe, or unusual headache symptoms as a reason to see a doctor rather than reach for another home remedy.

Heartburn Relief at Home: 10 Easy Ways to Feel Better

Heartburn Relief at Home: 10 Easy Ways to Feel Better

Heartburn Relief at Home: Natural Remedies That Actually Help

That burning climbing up your chest right after dinner has a way of ruining an otherwise good evening — and reaching for the same trigger foods tomorrow because “it’ll probably be fine” rarely ends well. If you’re looking for heartburn relief at home, the good news is that most occasional heartburn responds well to simple, low-risk changes you can make tonight, without a pharmacy run. This guide walks through what genuinely helps, what sounds like folk wisdom but can actually make things worse, how to tell whether a home approach is even appropriate for what you’re feeling, and the specific warning signs that mean it’s time to stop self-treating and see a doctor. No supplement stack, no vague “just relax” advice — just what to actually do tonight.

Quick Answer

For occasional heartburn at home, sit upright rather than lying down, avoid eating for at least 2–3 hours before bed, and try sipping water or chewing sugar-free gum to ease symptoms. Elevating the head of your bed helps with nighttime heartburn. If heartburn happens more than twice a week, or antacids stop helping, see a GP rather than continuing to self-treat.

Key Takeaways

  • Staying upright after eating is one of the simplest, most effective things you can do.
  • Timing matters as much as food choice — a large meal right before bed is a common trigger.
  • “Natural” doesn’t automatically mean risk-free — some remedies can worsen symptoms for certain people.
  • Nighttime heartburn responds especially well to raising the head of your bed.
  • Heartburn more than twice a week is a signal to see a doctor, not push through with home remedies.
  • Identifying your personal trigger foods matters more than following a generic remedy list.

Why Trust This Guide

This guide was written and reviewed by the Spiritual Meditation Yoga Editorial Team. We’ve deliberately left out specific supplement dosages, branded products, and remedies with thin or conflicting evidence behind them — our focus is on well-established, low-risk habits, with a clear, upfront point at which home care isn’t the right tool anymore.

What’s Actually Happening When You Get Heartburn?

Heartburn is the burning sensation caused by stomach acid moving up into the oesophagus — the tube connecting your throat to your stomach. It happens when the valve between your stomach and oesophagus relaxes or opens at the wrong time, letting acid travel where it shouldn’t.

Occasional heartburn after a heavy or spicy meal is extremely common and usually responds well to home approaches. Frequent heartburn — more than twice a week — can be a sign of gastro-oesophageal reflux disease (GERD) or another underlying issue, and is worth discussing with a doctor rather than managing indefinitely with home remedies alone.

heartburn relief at home

Immediate Relief: What to Do Right Now

  • Sit or stand upright. Gravity alone helps keep stomach acid where it belongs — avoid lying down for at least 2–3 hours after eating or after symptoms start.
  • Sip water slowly. This can help clear acid from the lower oesophagus.
  • Chew sugar-free gum. Chewing increases saliva production, which naturally helps neutralise acid.
  • Loosen tight clothing around your waist, which can add pressure to your stomach.
  • A small amount of baking soda dissolved in water is a commonly used home approach to neutralise acid occasionally — it isn’t meant for frequent or long-term use, and isn’t suitable if you’re on a low-sodium diet.

Editor’s Insight: Most people reach for a remedy after the burning starts, but posture in the 2–3 hours before it starts is usually the bigger lever — prevention beats treatment here.

Easing Nighttime Heartburn

Nighttime heartburn responds particularly well to a few specific adjustments:

  • Raise the head of your bed by around 15–20cm using bed risers or a wedge pillow — stacking regular pillows usually isn’t steep enough to help.
  • Sleep on your left side where possible, which can reduce how easily acid travels upward compared to sleeping on your right side or back.
  • Finish eating at least 2–3 hours before bed, and avoid late-night snacking even if you wake up hungry.

Trigger Foods and Habits Worth Reviewing

Common triggers include spicy or fatty foods, citrus, tomato-based dishes, chocolate, caffeine, carbonated drinks, and alcohol — but triggers are genuinely individual. Keeping a brief note of what you ate before a flare-up for a week or two is often more useful than following a generic “avoid this list” from an article, since your own patterns may differ.

Large meals and eating too quickly are also common contributors, independent of what’s actually on the plate — smaller, slower meals can meaningfully reduce symptoms even without changing what you eat.

Common Mistakes People Make Treating Heartburn at Home

Mistake 1: Lying down right after eating. Why it happens: it’s tempting after a big meal. Why it matters: lying down makes it far easier for acid to travel upward. Better approach: stay upright for at least 2–3 hours after eating.

Mistake 2: Relying on antacids more than a couple of times a week without seeing a doctor. Why it happens: they work quickly, so it’s easy to keep reaching for them. Why it matters: frequent need for antacids can mask an underlying issue like GERD that needs proper diagnosis. Better approach: treat frequent antacid use as a signal to book a GP appointment, not a long-term solution.

Mistake 3: Assuming “natural” remedies are automatically safe to combine with medication. Why it happens: herbal or food-based remedies feel lower-risk. Why it matters: some herbal remedies can interact with medications or worsen symptoms for certain people. Better approach: check with a doctor or pharmacist before combining herbal remedies with any regular medication.

Mistake 4: Stacking pillows instead of properly elevating the bed. Why it happens: it seems like an easier fix. Why it matters: stacking pillows mostly elevates your head and neck, not your torso, so it does little to stop acid reflux and can strain your neck. Better approach: use a wedge pillow or bed risers under the actual bed frame.

Mistake 5: Ignoring meal timing while focusing only on food choice. Why it happens: it’s easier to think about ingredients than habits. Why it matters: eating late or eating too fast can trigger heartburn even with “safe” foods. Better approach: address timing and pace alongside any dietary changes.

A Real-World Scenario: One Week of Small Changes

Illustrative Scenario

This is a composite example built from common experiences, not a verified individual case. James, a 45-year-old who often ate dinner late after work, had nighttime heartburn most weeks. In days 1–2, he simply moved dinner earlier and stayed upright afterward — he noticed slightly less discomfort but still woke up with symptoms occasionally. By day 4, he added a wedge pillow to properly elevate his upper body at night, and the nighttime symptoms dropped noticeably. By day 7, keeping a rough food note revealed his flare-ups tracked closely with a particular pasta sauce he ate weekly — something he hadn’t previously connected to his symptoms at all.

Identifying a personal trigger, rather than following a generic avoid-list, is a commonly reported turning point — though everyone’s triggers and timelines differ, and this isn’t a guaranteed outcome.

Which Approach Fits Your Heartburn Pattern?

Your Pattern Start Here
Mostly happens right after big meals Smaller, slower meals + staying upright afterward
Mostly happens at night / disturbs sleep Bed elevation + finishing dinner earlier
Seems linked to specific foods A short food-and-symptom note to identify your personal triggers
Happens more than twice a week regardless of habits See a GP — this pattern needs proper assessment, not more home remedies

Comparison: Home Approaches by Speed of Relief

Approach Speed Best For
Sitting upright / walking gently Minutes In-the-moment discomfort
Sugar-free gum / sipping water Minutes Mild, occasional symptoms
Bed elevation Same night Recurring nighttime heartburn
Meal timing and portion changes Days to 1–2 weeks Ongoing, pattern-based heartburn
Identifying personal trigger foods 1–2 weeks of tracking Recurring but inconsistent flare-ups

Heartburn Relief Checklist

Checklist 1: Tonight

  • Finish eating at least 2–3 hours before bed
  • Stay upright after your meal instead of lying down
  • Elevate the head of your bed properly if symptoms are nighttime-specific
  • Avoid your usual trigger foods just for tonight if you already suspect one

Checklist 2: This Week

  • Keep a brief note of meals and symptoms to spot your personal triggers
  • Reduce meal size and eating speed, even before changing ingredients
  • Track how often you’re reaching for antacids
  • Book a GP appointment if symptoms occur more than twice a week

When to See a Doctor Instead

Important Safety Note

See a GP if heartburn happens more than twice a week, if it’s getting worse despite home changes, if you have difficulty or pain swallowing, unexplained weight loss, persistent nausea or vomiting, or if you need antacids for longer than two weeks. Seek urgent medical attention if chest pain is severe, spreads to your arm or jaw, or comes with shortness of breath or sweating — these can be signs of a heart problem, not heartburn, and shouldn’t be self-treated at home. This guide is educational and isn’t a substitute for personalised medical advice.

Frequently Asked Questions

What is the fastest home remedy for heartburn?

Sitting or standing upright and sipping water tends to bring the fastest relief for mild, occasional heartburn, often within minutes.

Does drinking milk help heartburn?

Milk can temporarily soothe heartburn for some people but worsen it for others, especially full-fat milk. It’s worth testing carefully rather than assuming it will help.

How can I stop heartburn at night?

Raise the head of your bed by 15–20cm using risers or a wedge pillow, avoid eating for 2–3 hours before bed, and try sleeping on your left side.

Is baking soda safe for heartburn?

A small amount dissolved in water is a commonly used occasional remedy, but it isn’t suitable for frequent use or for people on a low-sodium diet, and shouldn’t replace medical advice for recurring symptoms.

What foods should I avoid for heartburn relief at home?

Common triggers include spicy or fatty foods, citrus, tomato-based dishes, caffeine, chocolate, and alcohol — though personal triggers vary, so tracking your own pattern is more useful than a generic list.

When does heartburn become something more serious?

If it happens more than twice a week, disrupts sleep regularly, or comes with swallowing difficulty or unexplained weight loss, it’s worth seeing a GP to check for GERD or another underlying cause.

Can stress make heartburn worse?

Yes — stress can increase how sensitive you are to reflux symptoms and affect digestion, so stress-reduction techniques can be a useful addition alongside dietary and positional changes.

Sources & References

  • General principles reflect widely recognised, low-risk lifestyle approaches to occasional heartburn (posture, meal timing, bed elevation); readers with frequent or worsening symptoms should consult a GP for proper assessment rather than relying on home remedies alone.

About the Author

Written and reviewed by the Spiritual Meditation Yoga Editorial Team. We publish educational content on natural wellness, meditation, yoga, mindfulness, spirituality, and holistic wellbeing, prioritising clear explanations, responsible guidance, and a transparent distinction between general home-care tips and situations that need professional medical attention.

This content is for educational purposes only and is not a substitute for professional medical advice.

Last reviewed: September 2026

Conclusion

Most occasional heartburn responds well to a few simple, low-risk changes — staying upright after eating, adjusting meal timing, and properly elevating your bed at night. Track your own patterns rather than following a generic avoid-list, and treat frequent symptoms (more than twice a week) as a clear signal to see a GP rather than a reason to try yet another home remedy. Small, consistent changes tonight are usually more effective than any single “miracle” fix.

Natural Remedies for Eye Strain: Simple Ways to Rest Tired, Screen-Weary Eyes

Natural Remedies for Eye Strain: Simple Ways to Rest Tired, Screen-Weary Eyes

Quick Answer: Most eye strain comes from hours of close-up screen focus and can often be eased without any medication. The fastest natural relief combines the 20-20-20 rule (looking at something 20 feet away for 20 seconds every 20 minutes), deliberate blinking, a warm compress, and the yoga technique of palming. Most cases improve within a day or two of adjusting screen habits. See an eye doctor if strain is constant, worsens, or comes with blurred vision, headaches that won’t lift, or eye pain.

If your eyes feel tired, dry, or achy by mid-afternoon, you are far from alone. Digital eye strain, sometimes called computer vision syndrome, has become one of the most common complaints among people who spend their day on a laptop, phone, or tablet. The good news is that it is usually a habit problem, not a disease, and it responds well to a handful of simple, natural changes.

This guide explains what is actually happening in your eyes when they feel strained, walks through natural remedies backed by eye-care research and gentle yoga practice, and answers the questions people ask most about eye strain relief.

Why Trust This Guide?

The information here draws on published guidance from the American Optometric Association, the American Academy of Ophthalmology, and peer-reviewed research on yogic eye practices such as palming and trataka. It is written for general education and does not replace an eye exam or the advice of an optometrist or ophthalmologist.

Key Takeaways

  • Eye strain is almost always caused by prolonged close focus, reduced blinking, and screen glare, not by permanent eye damage.
  • The 20-20-20 rule is the single most recommended habit for preventing digital eye strain.
  • Palming and gentle eye-focus exercises from yoga can calm strained eye muscles in minutes.
  • Screen distance, lighting, and blue-light exposure all matter more than most people realize.
  • Persistent strain, blurred vision, or headaches deserve a proper eye exam rather than more home remedies.

About This Guide

This article is prepared by the Spiritual Meditation Yoga editorial team, drawing on published eye-care guidance and traditional yogic eye practices. It is intended for general wellness education, not diagnosis.

What’s Actually Happening: Understanding Digital Eye Strain

When you focus on a screen, your eye muscles hold a fixed near-focus position for long stretches, and your blink rate drops by as much as half. That combination dries out the tear film on the surface of the eye and fatigues the tiny muscles that control focus, which is what produces that tired, gritty, “worked too hard” feeling by the end of the day.

Several everyday factors make this worse: screens held too close, small text that forces you to squint, glare from overhead lighting or a bright window, uncorrected vision problems, and simply forgetting to blink during focused tasks like reading or scrolling. None of this means your eyes are being damaged in a lasting way; it means they are working overtime without the breaks they are built to take.

Common Signs of Eye Strain

  • Sore, tired, or burning eyes
  • Blurred or double vision that improves after resting
  • Dry eyes or, less intuitively, watery eyes
  • Headaches, especially around the temples or behind the eyes
  • Increased sensitivity to light
  • Neck and shoulder tension from leaning toward a screen

8 Natural Remedies for Eye Strain

1. Follow the 20-20-20 Rule

Every 20 minutes, look at something roughly 20 feet away for at least 20 seconds. This lets the focusing muscles inside your eyes relax completely, rather than staying locked in a near-focus position all day. Eye-care organizations consistently point to this as the single best habit for preventing digital eye strain, and it costs nothing but a moment of attention.

2. Blink on Purpose

Screen use can cut your blink rate by half, which lets the tear film evaporate faster than it’s replaced. Every so often, pause and blink slowly and fully ten times in a row. It sounds almost too simple, but it is one of the fastest ways to relieve the dry, gritty feeling that comes with long screen sessions.

3. Try Palming, a Classic Yoga Eye Technique

Palming is a restful practice used in yoga to soothe tired eyes: rub your palms together until they feel warm, then gently cup them over your closed eyes without pressing on the eyeballs, letting the warmth and darkness settle in for 30 to 60 seconds while you breathe slowly. Small studies on yogic eye practices have found this kind of short, focused rest can reduce reported eye fatigue and even lower measurable eye pressure in some participants. Repeat it two or three times during a long work session.

4. Apply a Warm Compress

A clean, warm (not hot) washcloth held gently over closed eyes for five to ten minutes increases blood flow to the eyelids and can loosen the oil glands that keep your tears from evaporating too quickly. This is especially useful if your strain comes with dryness rather than just fatigue.

5. Adjust Your Screen Distance, Height, and Text Size

Position screens about an arm’s length away (roughly 20 to 28 inches) with the top of the screen at or slightly below eye level, so you are looking gently downward rather than straining upward. Increase text size rather than leaning in to compensate for small type, which is one of the most common and most fixable causes of strain.

6. Reduce Glare and Balance Your Lighting

Position your screen so windows and overhead lights are to the side rather than directly in front of or behind you, and consider a matte screen filter if glare is unavoidable. Very bright rooms and very dark rooms both make screens harder on the eyes; aim for ambient light close to your screen’s own brightness.

7. Practice Gentle Eye-Focus Shifts (Near-Far Focusing)

Hold a finger about 10 inches from your face, focus on it for a few seconds, then shift focus to an object across the room, and repeat ten times. This near-far exercise, borrowed from vision therapy and gentle yoga eye routines alike, keeps the focusing muscles flexible instead of locked into one distance all day.

8. Stay Hydrated and Consider Lubricating Drops

Mild dehydration reduces tear production, so keep water within reach during long screen sessions. If dryness persists, preservative-free artificial tears from a pharmacy can supplement your natural tear film; ask a pharmacist or optometrist which type suits you if you wear contact lenses.

A Short Yoga Routine for Tired Eyes

If you practice yoga or meditation already, eye strain relief fits naturally into that routine. Try this two-minute sequence at your desk or before bed:

  • Blink and breathe: Ten slow, complete blinks paired with slow breathing.
  • Near-far focus: Ten repetitions, as described above.
  • Gentle eye circles: With eyes closed, slowly roll your gaze in a circle, five times each direction, without straining.
  • Palming: Finish with 60 seconds of palming, breathing slowly in the warm darkness.

This mirrors the traditional yogic eye-care sequence built around trataka (steady gazing) and palming, both of which are taught as ways to rest and steady the eyes as part of a broader meditation practice.

When to See a Doctor

Home remedies handle most day-to-day eye strain, but book an eye exam if you notice any of the following:

  • Strain, blurring, or discomfort that persists despite regular breaks and the changes above
  • Sudden changes in vision, double vision, or difficulty focusing
  • Eye pain, redness, or discharge
  • Headaches that are frequent, severe, or new for you
  • You haven’t had an eye exam in more than a year and rely on screens daily

Uncorrected vision problems are a common hidden cause of “eye strain,” so a routine eye exam is worth ruling out even if your symptoms are mild.

Frequently Asked Questions

How long does eye strain usually last?

Simple digital eye strain typically eases within a few hours of rest and usually resolves within a day or two once you adjust screen habits. If it lingers longer than that, it’s worth having your eyes checked.

Can eye strain cause permanent damage?

No. Eye strain is uncomfortable but is not known to cause lasting damage to the eyes. It’s a fatigue response, similar to a tired muscle, rather than an injury.

Do blue light glasses actually help with eye strain?

Evidence for blue-light filtering glasses reducing eye strain specifically is mixed, and most eye-care organizations point to blink rate, screen distance, and regular breaks as having a bigger impact than blue-light filters alone. They may still help some people sleep better if used in the evening.

What causes eye strain besides screens?

Reading in dim light, driving long distances, extended focus on detailed handwork, and uncorrected vision problems can all bring on the same tired, achy feeling as screen use. Anything that demands sustained close focus without breaks can produce eye strain.

Can yoga really help with eye strain?

Yoga doesn’t change your eyeglass prescription, but practices like palming and trataka give the eye muscles a genuine chance to rest and can lower stress, which often makes strain feel worse than it is. Many people find a short eye-yoga break more calming and more effective than simply closing their eyes for the same amount of time.

Is it bad to rub your eyes when they feel strained?

Occasional gentle rubbing is usually harmless, but vigorous or frequent rubbing can irritate the eye surface and, in people prone to it, has been linked to changes in the shape of the cornea over time. A warm compress or palming gives similar relief without the risk.

How often should I take screen breaks?

Aim for a short 20-second break every 20 minutes, plus a longer 5 to 10 minute break away from screens every hour or two. Setting a recurring timer is the easiest way to make this automatic rather than relying on willpower.

Related Natural Remedies to Explore

Looking for more natural relief guides? See our articles on homemade remedies for a sore throat, natural cough relief, and our full collection of home remedy guides.

How to Meditate for Beginners at Home (Simple Guide)

How to Meditate for Beginners at Home (Simple Guide)

How to Meditate for Beginners at Home

If you have ever sat down to meditate and thought, “Am I even doing this right?” — you are in exactly the right place. Meditation can feel mysterious from the outside, but at its simplest it is just a way to pause, breathe and gently rest your attention. You do not need incense, an app subscription or an hour of free time. You need a quiet-ish corner, a few minutes and a little patience.

This guide shows you how to meditate for beginners at home, step by step: how to set up your space, choose a technique that suits you, sit comfortably, and handle the wandering mind that trips up almost everyone at the start. By the end, you will have a realistic five-minute routine you can begin today — and a clear sense of what “doing it right” actually means.

Time needed: 5–10 minutes
🎚 Difficulty: Beginner
🧘 Props/equipment: none (a cushion or chair helps)
🕐 Best time: morning or evening — whichever you’ll repeat

Quick Answer

To meditate at home as a beginner, sit comfortably in a quiet spot, set a timer for five minutes, close your eyes and breathe naturally. Rest your attention on the feeling of each breath. When your mind wanders, gently return to the breath. That returning is the practice — repeat daily.

Key Takeaways

  • Meditation is simply resting your attention — noticing when it drifts, and bringing it back.
  • Start with 5 minutes a day; consistency matters far more than length.
  • You do not need special equipment — a chair or cushion is enough.
  • A wandering mind is normal and expected; noticing it is the skill, not a failure.
  • Guided or mindful-breathing meditation is the easiest entry point for beginners.
  • Sit upright but relaxed — lying down often leads to sleep.
  • Pick a consistent time and anchor it to an existing habit to build the routine.

What Meditation Actually Is (and Isn’t)

Meditation is a practice of intentionally directing and resting your attention — often on the breath, the body or a word — to cultivate calm, awareness and focus. It is a skill you build gradually, not a state you switch on.

Meditation has roots stretching back thousands of years across Buddhist, Hindu and other contemplative traditions, where it formed part of a wider spiritual path. Today it is practised both as a secular wellbeing tool and as part of those older traditions. A common misconception is that meditation means “emptying the mind” or “stopping thoughts.” It doesn’t. Thoughts will keep arising — the practice is in how you relate to them: noticing, letting go and returning, without frustration or judgement.

how to meditate for beginners at home

Why Meditating at Home Works So Well

Home removes almost every barrier that stops beginners. There is no class to book, no commute and no audience. Meditating at home is convenient, private and flexible — you can practise any time, in a space where you feel comfortable and undisturbed, and many resources are free or low-cost. That privacy matters more than people expect: when no one is watching, you stop worrying about “looking like you’re meditating properly” and can simply practise.

Editor’s Insight: The biggest advantage of home practice isn’t comfort — it’s repeatability. A five-minute sit you can do every morning beats a perfect studio session you manage once a fortnight.

Setting Up Your Meditation Space

You do not need a dedicated room — just a spot your mind can begin to associate with calm.

  • Choose a quiet-enough corner. A bedroom corner, a comfy chair or a cushion by a window all work. Complete silence isn’t required.
  • Reduce obvious distractions. Put your phone on Do Not Disturb (or use it only for a timer or guided track).
  • Get comfortable and warm. You don’t need any specialist equipment — just somewhere comfortable and warm to sit; a cushion, chair or bed all work, as long as you’re comfortable and can stay upright.
  • Keep it simple. A candle or a plant is nice, but nothing is essential. The space serves the habit, not the other way round.

Choosing a Beginner-Friendly Technique

There are many styles of meditation, but a few are especially forgiving for beginners:

Technique What You Do Best For
Mindful breathing Rest attention on the natural breath Almost everyone; the simplest start
Guided meditation Follow an audio or video teacher People who like structure and prompts
Body scan Move attention slowly through the body Relaxation, winding down, sleep
Mantra meditation Silently repeat a calming word or phrase Minds that settle better with an anchor word
Loving-kindness Direct goodwill towards yourself and others Cultivating warmth and emotional balance

For beginners, starting with guided meditation or mindfulness (breathing) meditation is usually easiest. You don’t need to choose “forever” — try one for a week and see how it feels.

How to Meditate: A 5-Step Method

Step 1: Preparation

Pick your spot and set a timer for 5 minutes. Knowing the session has a defined end reduces the restlessness that comes from wondering “how much longer?”

Step 2: Position

Sit in a comfortable position — cross-legged on a cushion, kneeling, or in a chair with your feet flat on the floor, with your spine approximately upright (not rigidly straight — a gentle natural curve is fine) and your hands resting in your lap or on your thighs. You do not have to sit on the floor.

Step 3: Technique

Close your eyes (or lower your gaze). Breathe naturally and bring your attention to the physical sensation of breathing — the air at your nostrils, or the gentle rise and fall of your chest or belly. If it helps, silently note “breathing in… breathing out.”

Step 4: Duration

Stay with the breath for the full five minutes. Each time you notice your attention has wandered — to a thought, a sound, a plan — gently escort it back to the breath. No annoyance needed; this is the exercise.

Step 5: Completion

When the timer sounds, don’t leap up. Take one slower breath, notice how your body feels, and open your eyes gradually. That brief pause helps the calm carry into your day.

Beginner modification: If focusing on the breath feels difficult, use a guided track for the first week so a voice does the steering. Common difficulty: Feeling fidgety or “bad at it” — that’s normal. What to expect: Some sessions feel calm, others feel busy; both are fine, and progress shows up over weeks, not single sittings. What to avoid: Judging the session as “good” or “bad” — the only failed meditation is the one you talk yourself out of doing. When to stop: If you feel genuinely distressed rather than simply restless, it’s fine to open your eyes, breathe normally and pause for the day.

Safety & When to Take Care

A Few Sensible Notes

Situation Take Care
History of anxiety, panic or trauma Some people, particularly those with anxiety, find that directing attention inward initially increases awareness of anxious sensations. Start very short, keep eyes slightly open, or use guided practice. Consider working with a teacher or therapist.
Feeling sleepy during practice Sit more upright, meditate earlier in the day, or try walking meditation instead of lying down.
Existing mental-health condition Meditation supports wellbeing but is not a substitute for professional care. Speak to your GP or a qualified professional if symptoms are significant.

This article is educational and is not a substitute for professional medical advice.

How Long Should Beginners Meditate?

Start small and stay consistent. Five to ten minutes a day is an ideal beginner range, and you can extend it gradually as sitting becomes easier. A daily five-minute habit builds the skill far faster than an occasional half-hour. As one experienced meditator describes it, five minutes can feel like an eternity at the start — yet with practice, much longer sessions begin to pass quickly. Let length follow comfort, not ambition.

What to Do When Your Mind Won’t Settle

This is the single most common beginner experience — and the one that makes people quit. Here’s the reframe that changes everything:

Noticing that your mind has wandered is not a failure — it is the practice. The mental act of noticing you’ve got lost and redirecting your attention is what builds the skill. A session where you notice a hundred distractions and return a hundred times is not a bad session; it’s 100 repetitions of the core exercise.

A busy mind is the normal condition of an untrained mind, and busy minds actually make good practice material — concentration is built by returning, not by achieving silence, and it builds over time (week 8 feels different from week 1).

So when your mind races: don’t fight it, don’t grade yourself. Just notice, and come back. Again and again. That’s it.

Common Beginner Mistakes (and Better Approaches)

Mistake 1 — Trying to “empty” the mind. Why it happens: it’s the popular image of meditation. Why it matters: it sets an impossible goal, so beginners feel like failures. Better approach: aim to notice and return, not to erase thoughts.

Mistake 2 — Starting with sessions that are too long. Why it happens: enthusiasm, or thinking longer is better. Why it matters: long, uncomfortable sits kill motivation. Better approach: begin with five minutes and grow slowly.

Mistake 3 — Lying down (then falling asleep). Why it happens: it feels the most relaxing. Why it matters: lying down tends to lead to sleep, particularly for beginners. Better approach: sit upright but relaxed; save lying down for a dedicated sleep meditation.

Mistake 4 — Judging each session as good or bad. Why it happens: we measure everything by results. Why it matters: it turns a calming practice into a test. Better approach: drop the scorecard; showing up is the win.

Mistake 5 — Practising only when you “feel like it.” Why it happens: no routine anchor. Why it matters: the habit never forms. Better approach: attach meditation to an existing daily cue (after brushing your teeth, before your first coffee).

Building a Daily Habit That Lasts

Editor’s Insights

  • Anchor, don’t schedule. “Meditate after I switch the kettle on” sticks far better than “meditate at 7:00 am.”
  • Same spot, same time. Repetition trains your brain to settle faster — the cushion becomes a cue.
  • A timer beats a clock-watch. Set it and forget it; checking the time is itself a distraction.
  • Count returns, not minutes. On a busy day, treat every “come back to the breath” as a rep well done.
  • One week per technique. Give a style seven days before deciding it’s “not for you.”

Which Technique Should You Try First?

Your Goal Consider Starting With
Easing in with structure Guided meditation
Building plain, portable focus Mindful breathing
Relaxing or winding down for sleep Body scan
Settling a very busy mind Mantra meditation
Cultivating warmth and calm Loving-kindness

No single technique is universally “best” — the right one is the one you’ll actually repeat.

Checklist 1: Before You Sit

  • Chosen a quiet-enough spot
  • Phone on Do Not Disturb
  • Timer set for 5 minutes
  • Comfortable, upright seat

Checklist 2: During Practice

  • Breathe naturally
  • Rest attention on the breath
  • Notice wandering without judgement
  • Gently return, as many times as needed

Frequently Asked Questions

How do I start meditating at home as a complete beginner?

Pick a quiet spot, sit comfortably and set a five-minute timer. Close your eyes, breathe naturally, and rest your attention on each breath. When your mind wanders, gently bring it back. Do this once a day and gradually extend the time as it feels easier.

How long should a beginner meditate?

Begin with five to ten minutes a day. Consistency matters more than duration — a short daily practice builds the skill faster than occasional long sessions. You can slowly increase the length once sitting still feels more natural, over a few weeks.

What is the best meditation position for beginners?

Sit upright but relaxed — cross-legged on a cushion, kneeling, or in a chair with your feet flat on the floor. Keep your spine gently upright and rest your hands in your lap. You don’t need to sit on the floor; a chair is perfectly fine.

Is it normal for my mind to wander constantly?

Yes — completely. A busy mind is the normal state of an untrained mind. Noticing that you’ve drifted and returning to the breath is the actual practice. Every return strengthens your focus, so a “distracted” session is still valuable practice.

Do I need any equipment to meditate at home?

No. You only need somewhere comfortable and warm to sit. A cushion or supportive chair can help you stay upright, and a timer or free guided track is useful, but none of it is essential to begin.

Can I meditate lying down or in bed?

You can, but it often leads to sleep — especially for beginners. If your goal is alert awareness, sit upright. Lying down suits a dedicated body-scan or sleep meditation, where drifting off isn’t a problem.

What’s the easiest type of meditation to start with?

Mindful breathing or guided meditation. Breathing meditation needs no tools, and guided sessions give you a voice to follow so you’re never unsure what to do next. Either is a gentle, forgiving entry point.

I have anxiety — is meditation safe for me?

For many people it helps, but turning attention inward can, at first, heighten awareness of anxious sensations for some. Start with very short, guided sessions and keep your eyes slightly open if needed. If anxiety is significant, meditate alongside support from a qualified professional.

  •  

Schema Recommendations

  • Article schema — core page markup
  • HowTo schema — the 5-step meditation method qualifies
  • FAQPage schema — the FAQ section (genuine Q&A)
  • BreadcrumbList schema — Home > Meditation > Beginners > this article
  • ImageObject schema — hero image

Structured data must match visible content.

Sources & References

About the Author

Written and reviewed by the Spiritual Meditation Yoga Editorial Team. Spiritual Meditation Yoga publishes educational content on meditation, yoga, mindfulness, spirituality and holistic wellbeing, prioritising clear explanations, responsible guidance, appropriate source-checking, and a transparent distinction between traditional teachings and evidence-based information.

This content is for educational purposes only and is not a substitute for professional medical advice. Always consult a qualified healthcare professional before beginning a new practice if you have a health condition.

Last reviewed: September 2026  |  Sources: NHS Every Mind Matters; Simply Psychology; Mindful.org

Conclusion

Meditating at home doesn’t require the perfect cushion, an empty mind or an hour to spare. It asks for five quiet minutes, a comfortable upright seat and a willingness to keep gently returning your attention to the breath. Do that most days and you’ll build a genuine, lasting practice — one noticing, one return at a time. Sit down, set the timer, and let today be day one.